Webチャット
Odoo Live Chat allows users to communicate with website visitors in real-time. With Live Chat, leads can be qualified for their sales potential, support questions can be answered in real time, and issues can be directed to the appropriate team for further investigation or follow up. Live Chat also provides the opportunity for instant feedback from customers.
ライブチャットを有効にする
ライブチャット アプリケーションのインストール方法は複数あります:
Go to the , search
Live Chat, and click Install.のリストビューに移動し、チームを選択して、そのチームの設定ページで、チャネル セクションの下にある ライブチャット のチェックボックスをクリックします。
に進み、Eメールマーケティング セクションまでスクロールし、ライブチャット の横のボックスにチェックを入れ、保存 をクリックします。

注釈
ライブチャット アプリケーションがインストールされると、デフォルトでライブチャットの チャネル が作成されます。
ライブチャットチャネルを作成する
To create a new live chat Channel, go to the . Then, click New to open a blank channel detail form. Enter the name of the new channel in the Channel Name field.
チャネル詳細フォームの残りのタブ (オペレータ、オプション、チャネル規則、および ウィジェット) を設定するには、以下の手順に従います。
ちなみに
任意のチャネルの詳細フォームにアクセスするには、ダッシュボードの ウェブサイトライブチャットチャネル に戻り、パンくずリストを使用します。適切なライブチャットチャネルのかんばんカードを見つけ、カーソルを合わせ、 :guilabel:` (縦三点リーダ)` アイコンをクリックしてドロップダウンメニューを開きます。チャネル設定 をクリックすると、チャネルの詳細フォームが開きます。
オペレータータブ
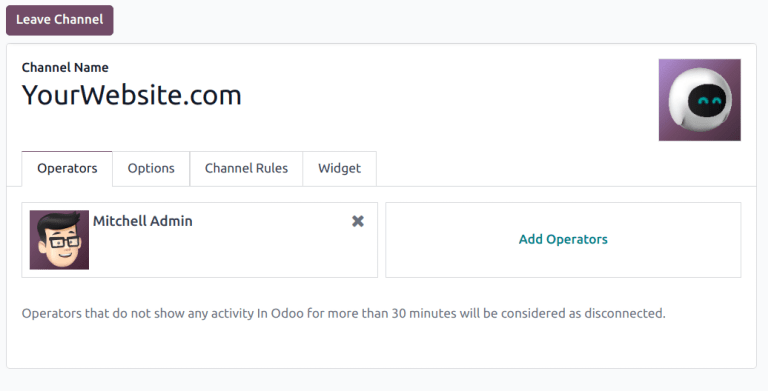
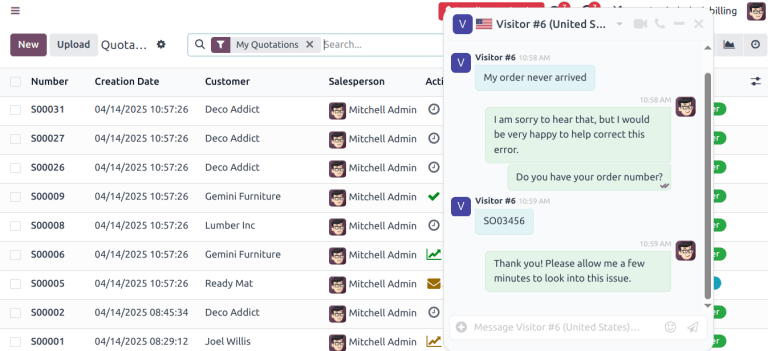
オペレーター とは、顧客からのライブチャットのリクエストに対応する担当者として業務を行うユーザを指します。 ライブチャットチャネルにユーザがオペレータとして追加されると、データベース内のどこにいてもウェブサイト訪問者からのチャットを受信することができます。 チャットウィンドウは画面の右下隅に開きます。
チャネルの詳細フォームで、オペレーター タブをクリックします。ライブチャットチャネルを最初に作成したユーザが、デフォルトでオペレーターとして追加されています。
注釈
Current operators can be edited, or removed, by clicking on their respective boxes in the Operators tab, which reveals a separate Open: Operators pop-up. In that pop-up, adjust any information, as needed. Then, click Save, or click Remove to remove that operator from the channel.
追加`をクリックすると、:guilabel:`追加: オペレータ ポップアップウィンドウが表示されます。
ポップアップウィンドウで、希望するユーザを見つけるためにスクロールするか、検索バーに名前を入力します。次に、追加するユーザの横にあるチェックボックスにチェックを入れ、選択 をクリックします。
このポップアップウィンドウから直接、新しいオペレーターを作成してリストに追加することもできます。新規作成 をクリックし、オペレーターを作成 フォームに入力します。フォームの入力が完了したら、保存して閉じる をクリックするか、複数のレコードを作成する場合は 保存して新規作成 をクリックします。
危険
新しいユーザを作成すると、データベース内の総ユーザ数が請求率に影響するため、Odooサブスクリプションのステータスに影響を与える可能性があります。新しいユーザを作成する前には、十分にご注意下さい。ユーザがすでに存在する場合、そのユーザをオペレーターとして追加しても、データベースのサブスクリプションや請求率は変更されません。
オプションタブ
The Options tab on the live chat channel detail form contains the visual and text settings for the live chat window.
Livechat window
The Livechat Window is the space where the live chat conversation with website visitors takes place.
Edit the Welcome Message to change the message a visitor sees when they open a new chat session. This message appears as though it is sent by a live chat operator, and acts as both a greeting and an invitation to continue the conversation.
Edit the Chat Input Placeholder to alter the text that appears in the box where visitors type their replies. This message prompts the visitor to initiate the chat.
The Channel Header is the colored bar at the top of the chat window. The Channel Header Color can be changed following the same steps as the Livechat button.
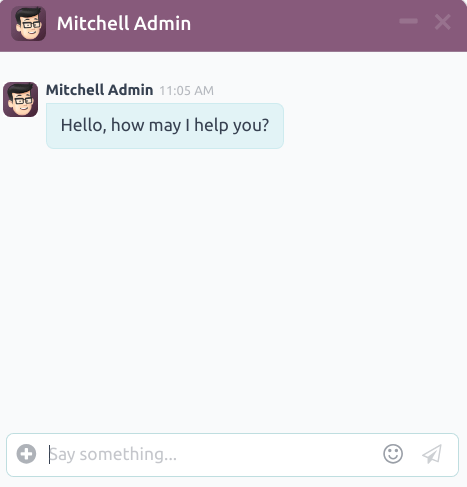
The live chat window with a purple channel header and placeholder text that reads, "Say Something..."
Channel Rules tab
To configure which website user actions open the live chat window, go to the Channel Rules tab on the live chat channel detail form.
To create a new channel rule, click Add a line. This opens the Create Rules pop-up window.
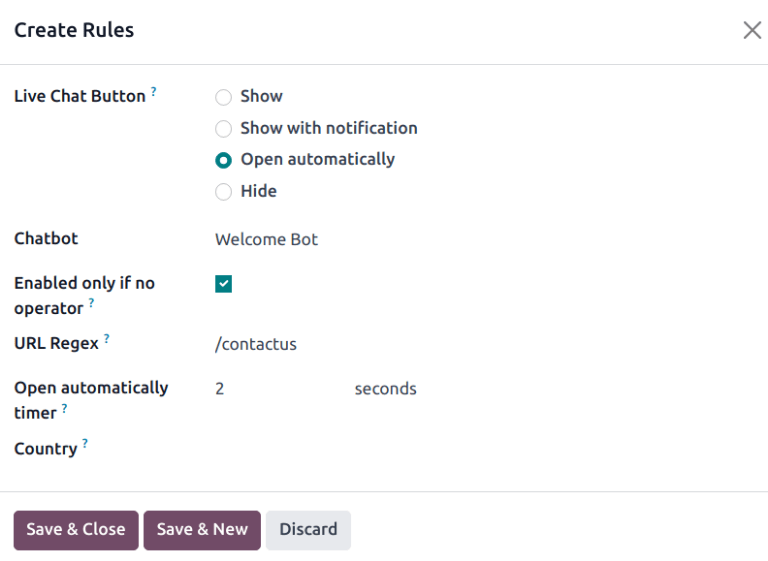
Create new rules
Fill out the fields on the Create Rules pop-up window as instructed below, then click Save & Close.
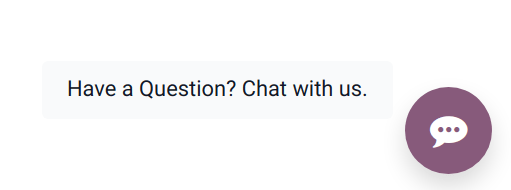
The Livechat Button is the icon that appears in the bottom-right corner of the website. Select from one of the following display options:
Show: displays the chat button on the page.
Show with notification: displays the chat button, as well as a floating text bubble next to the button.
Open automatically: displays the button, and automatically opens the chat window after a specified amount of time (designated in the Open automatically timer field, that appears when this option is selected).
Hide: hides the chat button on the page.
To include a Chatbot on this channel, select it from the drop-down menu. If the chatbot should only be active when no operators are active, check the box labeled Enabled only if no operator.
The Enabled only if no operator field is only visible if a chatbot is selected in the Chatbot field.
The URL Regex specifies the web pages where this rule should be applied. In the URL Regex field, input the relative URL of the page where the chat button should appear.
For example, to apply the rule to the URL, https://mydatabse.odoo.com/shop, enter /shop to
the URL Regex field.
To apply the rule to all pages on the database, enter / in the URL Regex
field.
This field designates the amount of time (in seconds) a page should be open before the chat window opens. This field only appears if the Live Chat Button for this rule is set to Open automatically.
If this channel should only be available to site visitors in specific countries, add them to the Country field. If this field is left blank, the channel is available to all site visitors, regardless of location.
注釈
In order to track the geographical location of visitors, GeoIP must be installed on the database. While this feature is installed by default on Odoo Online databases, On-Premise databases require additional setup steps.
Widget tab
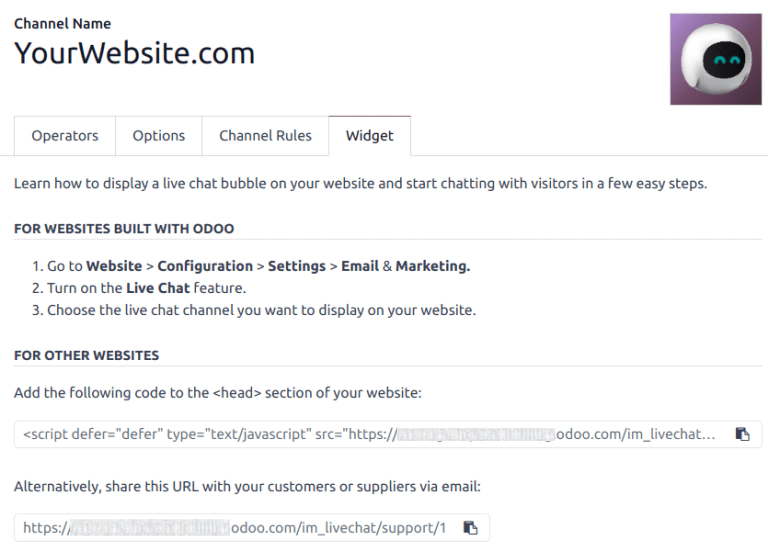
The Widget tab on the live chat channel detail form provides an embeddable code snippet for external, non-Odoo websites. This code can be added to a website to provide access to a live chat window.
ちなみに
The live chat widget can be added to websites created through Odoo by navigating to . Then, scroll to the section. In the Channel field, select the channel to add to the site. Click Save to apply.
To add the widget to a website created on a third-party platform, click the first
(copy) icon on the Widget tab, and paste the code into
the <head> tag on the site.
Likewise, to send a live chat session to a customer, click the second (copy) icon on the Widget tab. This link can be sent directly to a customer. When they click the link, they are redirected to a new chat window.
